English
 中文简体
中文简体Steering Cross Joint: Lifespan, Symptoms, and Replacement Costs
Content
- 1 What Is a Steering Cross Joint and What Does It Do?
- 2 Types of Steering Cross Joints
- 3 Warning Signs of a Failing Steering Cross Joint
- 4 What Causes Steering Cross Joint Failure?
- 5 How to Inspect a Steering Cross Joint
- 6 Steering Cross Joint Replacement: Cost and Process
- 7 OEM vs Aftermarket Steering Cross Joints: Which to Choose
- 8 Maintenance Tips to Extend Steering Cross Joint Life
A steering cross joint — also called a steering universal joint (U-joint) — is the critical link that transfers rotational force from your steering column to the steering rack or gearbox at an angle. When it fails, you lose precise steering control, which is a direct safety risk. Most steering cross joints last between 80,000 and 150,000 miles under normal use, but heavy-duty driving, lack of lubrication, or road impact can shorten that lifespan significantly. Replacing a worn joint typically costs $150–$400 in parts and labor — far less than the consequences of steering failure at highway speed.
What Is a Steering Cross Joint and What Does It Do?
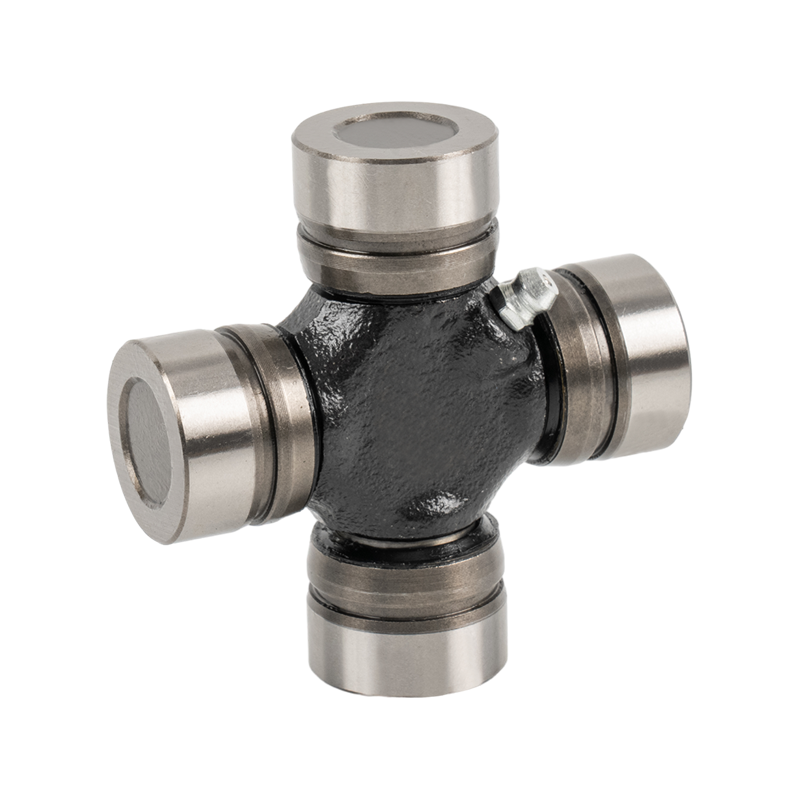
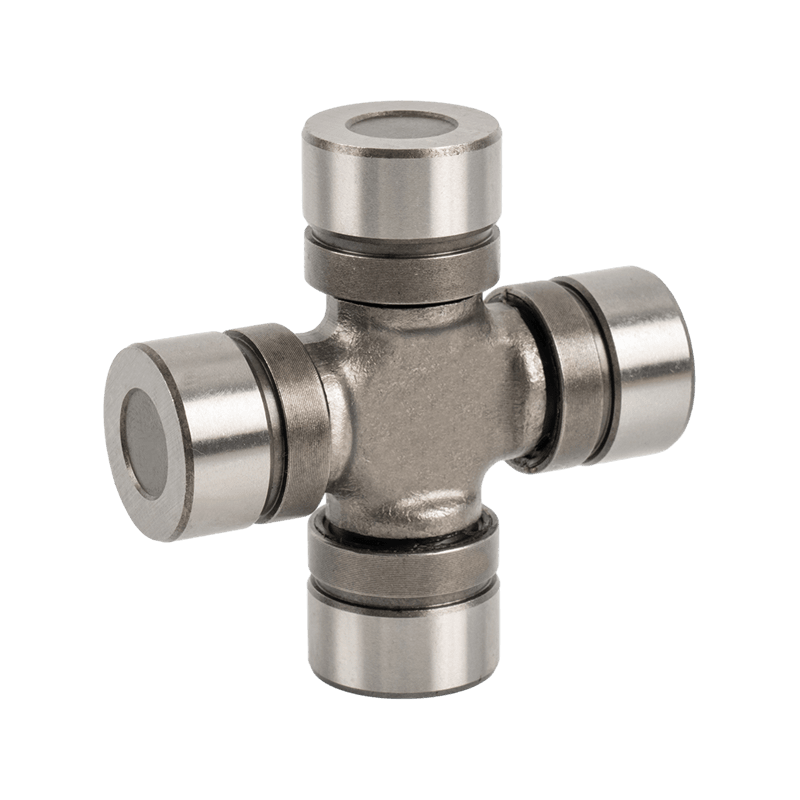
The steering cross joint is a mechanical coupling found inside the steering column assembly. Its primary job is to connect two shafts that are not perfectly aligned — allowing rotational motion to be transmitted smoothly across an angle, typically between 15° and 35° depending on the vehicle's design.
The joint gets its name from its cross-shaped internal trunnion (also called a spider), which fits into yoke cups on either side. Needle roller bearings inside each cup allow the cross to pivot freely in multiple directions, enabling constant velocity-like torque transfer even when the connected shafts are angled.
Where It Sits in the Steering System
In most passenger vehicles, one or two steering cross joints are located on the intermediate shaft — the section of the steering column between the steering wheel and the steering rack or recirculating ball gearbox. Some vehicles also use a collapsible or double-jointed intermediate shaft to protect the driver in a frontal crash. The cross joint enables this geometry to work without binding or slack.
Types of Steering Cross Joints
Not all steering cross joints are the same. The correct type depends on your vehicle's design, the angle of the shaft, and the torque demands of the steering system.
| Type | Design Feature | Typical Application | Max Operating Angle |
|---|---|---|---|
| Standard U-Joint (Cross Type) | Four needle-bearing cups on a cross spider | Most passenger cars and light trucks | ~35° |
| Double Cardan Joint | Two U-joints linked by a centering socket | 4WD trucks, SUVs with high steering angles | ~70° |
| Sealed (Pre-Greased) U-Joint | Factory-sealed, no grease fitting | Modern OEM steering columns | ~35° |
| Greaseable U-Joint | Zerk fitting for periodic lubrication | Older vehicles, heavy-duty trucks | ~35° |
Warning Signs of a Failing Steering Cross Joint
Steering cross joint failure rarely happens without warning. Recognizing the early symptoms allows you to address the problem before it becomes dangerous or costly.
Clunking or Clicking Noise When Turning
A clunking, popping, or clicking sound when turning the steering wheel — especially at low speeds or in parking lots — is the most common early sign of a worn cross joint. The noise is caused by worn or dry needle bearings inside the joint's cup. As the bearing surfaces deteriorate, they develop play and knock against the trunnion under load.
Steering Wheel Vibration or Shudder
A worn cross joint introduces imbalance into the steering shaft. This often presents as a vibration or shudder felt through the steering wheel, particularly at speeds between 45–70 mph. Unlike tire-related vibration, which is usually consistent, joint-related shudder may worsen during turns or when changing direction.
Loose or Vague Steering Feel
As the joint's needle bearings wear, internal play increases. Drivers often describe this as a "dead zone" in the steering wheel — a small amount of wheel rotation that produces no corresponding movement of the front wheels. Even 2–3mm of internal play in a cross joint can translate to noticeable slack at the steering wheel.
Binding or Stiff Spots When Turning
A cross joint that has seized or is severely rusted may cause the steering wheel to feel stiff or binding at certain angles. This is more dangerous than looseness because it can prevent the driver from completing a turn — particularly relevant during low-speed maneuvers or emergency swerving.
Uneven Tire Wear
A binding or inconsistent cross joint can affect the uniformity of steering input, indirectly causing irregular front tire wear patterns. If front tires show uneven wear that cannot be explained by misalignment alone, the steering shaft assembly is worth inspecting.
What Causes Steering Cross Joint Failure?
Understanding the root causes of failure helps you prevent premature wear and extend the life of replacement parts.
- Lack of lubrication: Sealed joints rely on factory grease that can dry out or be displaced over time. Greaseable joints that are never serviced develop dry needle bearings, which accelerate wear rapidly.
- Water and corrosion intrusion: Damaged or absent dust seals allow moisture and road debris into the bearing cups, causing rust and pitting on the trunnion and needles.
- Impact damage: Hitting a pothole, curb, or off-road obstacle at speed can shock-load the cross joint beyond its rated capacity, bending the trunnion or shattering needle bearings.
- High operating angle: Cross joints operated at angles above their design specification (e.g., after a lift kit installation without a corrected steering shaft) wear out significantly faster due to increased cyclic stress.
- Normal fatigue: Even with perfect maintenance, the needle bearings undergo millions of load cycles over the life of the vehicle and will eventually wear beyond acceptable tolerances.
How to Inspect a Steering Cross Joint
You can perform a basic steering cross joint inspection without special tools. Follow these steps:
- Park on a level surface and set the parking brake. Turn the ignition to the "accessory" position so the steering wheel unlocks.
- Locate the intermediate steering shaft under the dashboard or in the engine bay, depending on your vehicle's layout.
- With one hand on each side of the cross joint yoke, attempt to rock the joint in opposite directions. Any perceptible play or clunking indicates the joint has excessive wear.
- Rotate the joint through its full range of motion by hand. It should move smoothly with consistent resistance. Rough spots, grinding, or binding indicate damaged bearings.
- Inspect the dust seals on each bearing cup. Cracked, missing, or deformed seals mean moisture has likely entered — even if play is not yet present.
- If your joint has a Zerk grease fitting, check whether it accepts grease. A fitting that won't accept grease indicates a seized or fully packed bearing — a sign the joint is due for replacement, not just re-greasing.
As a general rule: if you can feel any play by hand, the joint has already progressed beyond early wear and should be replaced promptly.
Steering Cross Joint Replacement: Cost and Process
Replacement complexity varies by vehicle. On some models the cross joint is a standalone serviceable part; on others it is integrated into the intermediate shaft assembly and must be replaced as a unit.
Typical Replacement Costs
| Repair Type | Parts Cost | Labor Cost | Total Estimate |
|---|---|---|---|
| Cross joint only (greaseable replacement) | $15–$50 | $80–$150 | $95–$200 |
| Intermediate shaft assembly replacement | $80–$250 | $100–$200 | $180–$450 |
| Steering column with integrated joint | $200–$600 | $150–$300 | $350–$900 |
Key Steps in the Replacement Process
- Mark the shaft orientation before removal. The intermediate shaft and cross joint must be reinstalled in the exact same rotational position to preserve steering geometry.
- Remove the pinch bolts or snap rings securing the yoke to the shaft ends. These are typically 10mm–13mm bolts torqued to 25–35 ft-lbs on most passenger vehicles.
- Press or tap out the old cross joint using a U-joint press tool or a vise and appropriately sized sockets. Do not hammer directly on the trunnion.
- Clean the yoke bores thoroughly before installing the new joint. Any debris or burrs will cause the new bearing cups to seat unevenly.
- Press the new joint in until the snap rings seat fully. Confirm the joint moves freely through its full range of motion before reinstalling the shaft.
- Torque all fasteners to specification and verify there is no binding during a full lock-to-lock steering cycle before test driving.
OEM vs Aftermarket Steering Cross Joints: Which to Choose
Both OEM and quality aftermarket steering cross joints can be reliable choices, but they are not interchangeable in every situation.
- OEM joints are manufactured to the exact tolerances, angles, and load ratings specified for your vehicle. They are the safest choice for uncommon applications or vehicles with tight tolerance requirements, but typically cost 30–60% more than aftermarket alternatives.
- Aftermarket joints from reputable brands meet or exceed OEM specifications for most mainstream vehicles. Opt for a greaseable aftermarket joint when replacing a sealed OEM joint — it allows future maintenance and often outlasts the original sealed design.
- Avoid no-name budget joints with unknown material grades. Steering components are safety-critical; a cross joint failure at highway speed offers no margin for error.
Always verify the replacement joint's operating angle rating, shaft diameter, and yoke bolt pattern match your vehicle's intermediate shaft specifications before purchasing.
Maintenance Tips to Extend Steering Cross Joint Life
Proactive maintenance is the simplest way to avoid premature failure and the repair costs that follow.
- Grease greaseable joints every 30,000–50,000 miles or at every other oil change if you drive in wet, muddy, or dusty conditions. Use high-quality lithium-complex or moly-based chassis grease rated for universal joints.
- Inspect the dust seals annually. Replacing a $5 dust seal kit is far cheaper than replacing a joint that failed because moisture got in.
- Avoid full-lock steering holds. Holding the steering wheel at full lock (as far as it turns) for extended periods places the cross joint at maximum angle and maximum load simultaneously — accelerating wear.
- After lift kit installation, verify that the intermediate shaft angle remains within the cross joint's design specification. Installing a drop bracket or a double-jointed shaft may be necessary to prevent premature failure.
- Include the steering shaft in your routine undercarriage inspection when tires are rotated or brakes are serviced. Early detection of seal damage or developing play costs nothing and saves hundreds in preventable repairs.